WHY
learn a pistol squat?
1) Strength and balance on one leg.
2) Getting up and down from the floor.
3) A fun challenge!
PREREQ
for doing a pistol
Being able to squat on two legs and stand on one leg would be pretty helpful. But honestly, the main thing to look out for is that your hips, knees, and ankles are feeling pretty good! Pistol squats really challenge your stability, so we wanna make sure you’re starting from a confident place. If you don’t feel up for the challenge, reach out about building a strong foundation.
TOOLS
for practicing pistols
I intentionally designed this mini course so you could practice at home without fancy equipment! The only traditional gym thing you’ll see me use is a little dumbbell, but you can use anything you have that weighs a little something.
Step 0
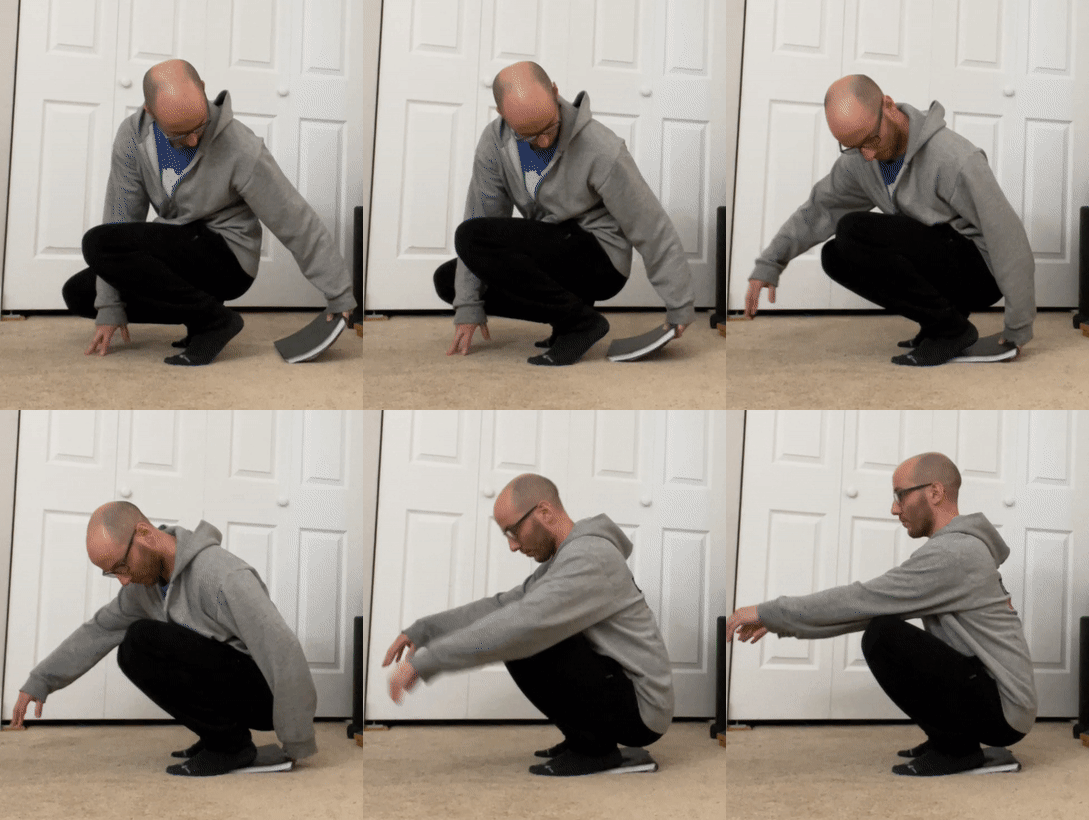
Two legs before one!
1) Elevate Heels
2) Counterweight
3) Both!
4) Reeeaaach!
**Hold onto any of these that you find helpful — they’ll play big roles in your pistol journey.
Step 1
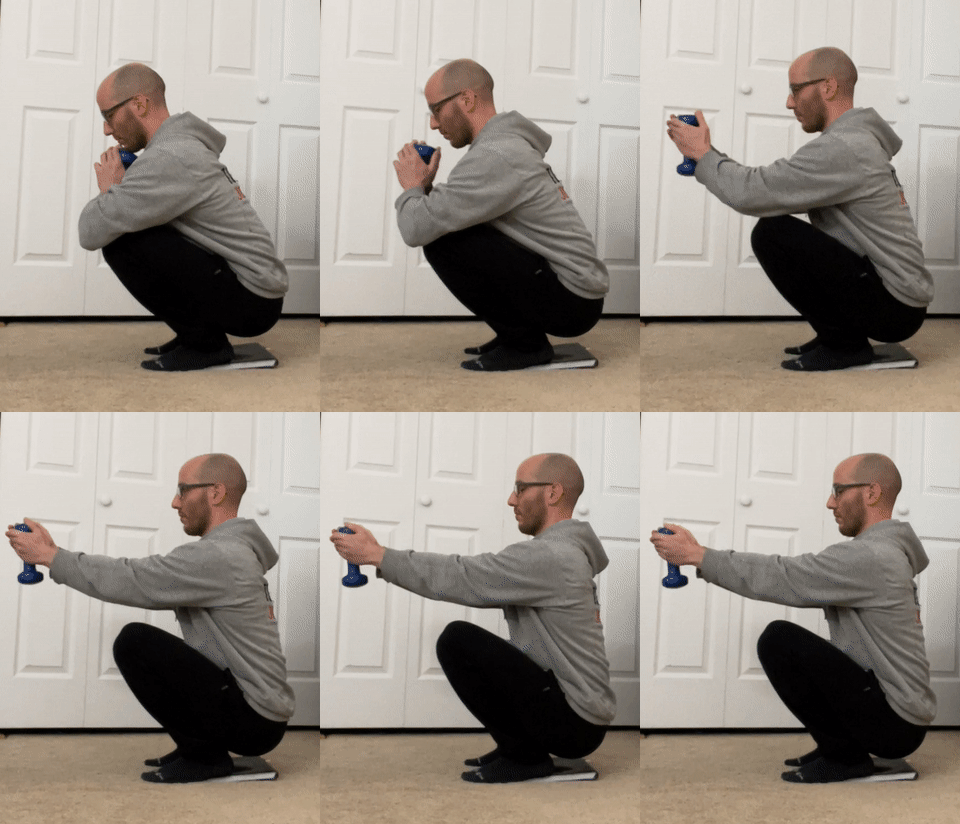
Find a comfy[ish] bottom position
1) Elevate heels, counterweight, and hold onto something
(you can use something more sturdy at first, but the broom will be helpful later)
2) Or elevate your whole setup
(so the floating leg doesn’t have to stay as high)
3) Maybe just a counterweight is enough?
4) Or even just a reeeaaaach!
*You do NOT need to be able to do all of these. Just ONE comfortable setup can set you up for success.
Step 2
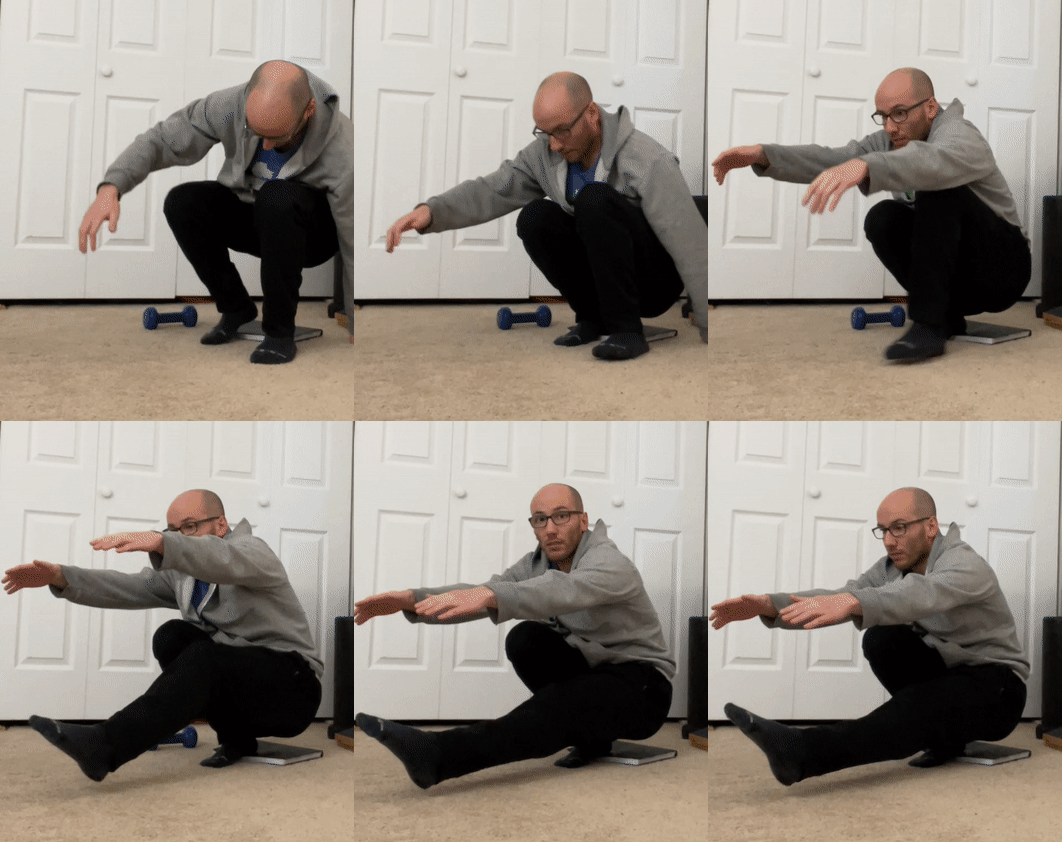
Full Pistol: Elevated + Assisted
Key Points:
- The higher your surface, the easier it should be. Just make sure it’s nice and stable!
- Hold object on opposite side of squatting leg
- Reach the arms and floating leg forward
- You can hold something sturdier than a broom, but I like that it allows you to adjust your reach during the movement.
*Can you control the way down, but not come back up? Try going down on one leg, up on two. Over time, you’ll build the way up!
Take a moment to consider: do you want STRENGTH or SKILL?
If your goal is to build lower body STRENGTH, then Step 2 is already a great option! You can stick with this progression, and gradually add reps, sets, or weight.
Or you can choose to progress the SKILL of doing an unassisted pistol on the floor by continuing on.
By the way, have a question? Scroll to the bottom to get a personal answer!
Step 3
Full Pistol: Assisted + Counterweight
Key Points:
- From Step 2, gradually stand on lower objects until you’re standing on the floor!
- Choose your counterweight carefully: too light and it won’t help, too heavy and you won’t be able to reach it as far forward.
- Strive to use the broom only as much as need it for the hardest parts of the movement.
*Make this step gradually harder by using the broom less and/or decreasing the counterweight.
Step 4
Full Pistol: Counterweight
Key Points:
- You can hold the weight in one hand or two.
- Make sure you’re also actively reaching forward with your arms and floating leg — the more weight you can get out in front of you, the easier it’ll be to stay balanced on your squatting leg.
*Like with any step, you might find that you’re able to control the way down before standing back up. Take your time to really control the whole way down, and you’ll be getting up soon!
Step 5
The Full Shebang!
Key Points:
- You don’t have your counterweight, but you have two free arms and a free leg to reach forward. Use them well!
- Having your hands free, you can also gently tap the floor near the bottom to help out as you build confidence down there. Sh, don’t tell anyone!
*If you’ve gotten this far, you’re a rockstar! That’s all :)
Questions?
Let’s get you unstuck!


